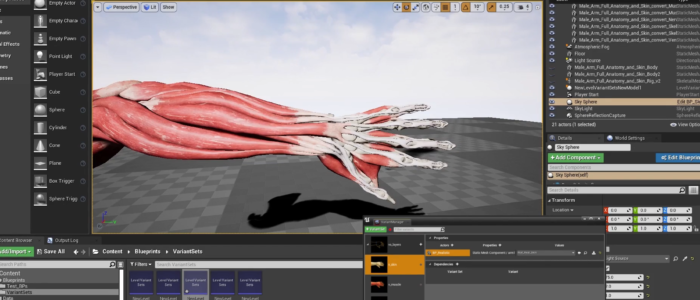
Multiple configurations of a scene in Unreal Engine can be managed in C++ code or through visual scripting with Blueprints. However, these can become overly complicated as a project grows. Luckily, there is a new, visual, and user-friendly option for configuring an AR scene. It’s called the Variant Manager!
These development notes are from AnatoMe, an experimental project to teach students about human anatomy through an interactive hologram. Further details can be found on the AnatoMe development page or other project related pages below:
- AnatoMe development
- Building a UI for a HoloLens 2 app
- Using the Variant Manager to control an AR scene (you are here!)
- Adding tooltips in Augmented Reality
Future proofing your project
During early stages of development while using a placeholder arm model, it was unclear if switching layers simply involved changing a single model’s material, or if it would involve the showing and hiding of various meshes. Also, the possible addition of tooltips to help students learn about anatomy could make using a ‘Blueprint only’ solution overly complicated and difficult to maintain. This is where the Variant Manager comes in.
What is the Variant Manager?
The Variant Manager is a visual panel that allows you to configure the attributes of objects in your scene. The functionality has recently been added to Unreal Engine, and as such is still marked as ‘beta’ and ‘experimental’ software. However, in testing it has performed robustly and provides essential organisational benefits of managing various configurations within a growing project.
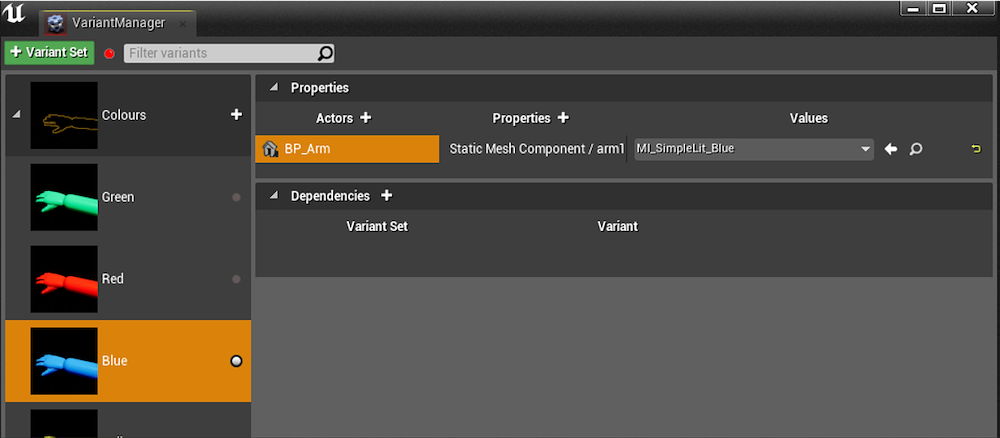
The Variant Manager provides an interface to create categories (or Variant Sets) that allows objects to have different configurations of materials, meshes, visibility, and a number of other attributes. In the Variant Set example of ‘Colours’ below, four variants have been added to the BP_Arm Actor with a separate setting for the Static Mesh Component’s Material. When a ‘Variant’ is double-clicked in the interface, the BP_Arm’s material is switched based on the value of the variant.
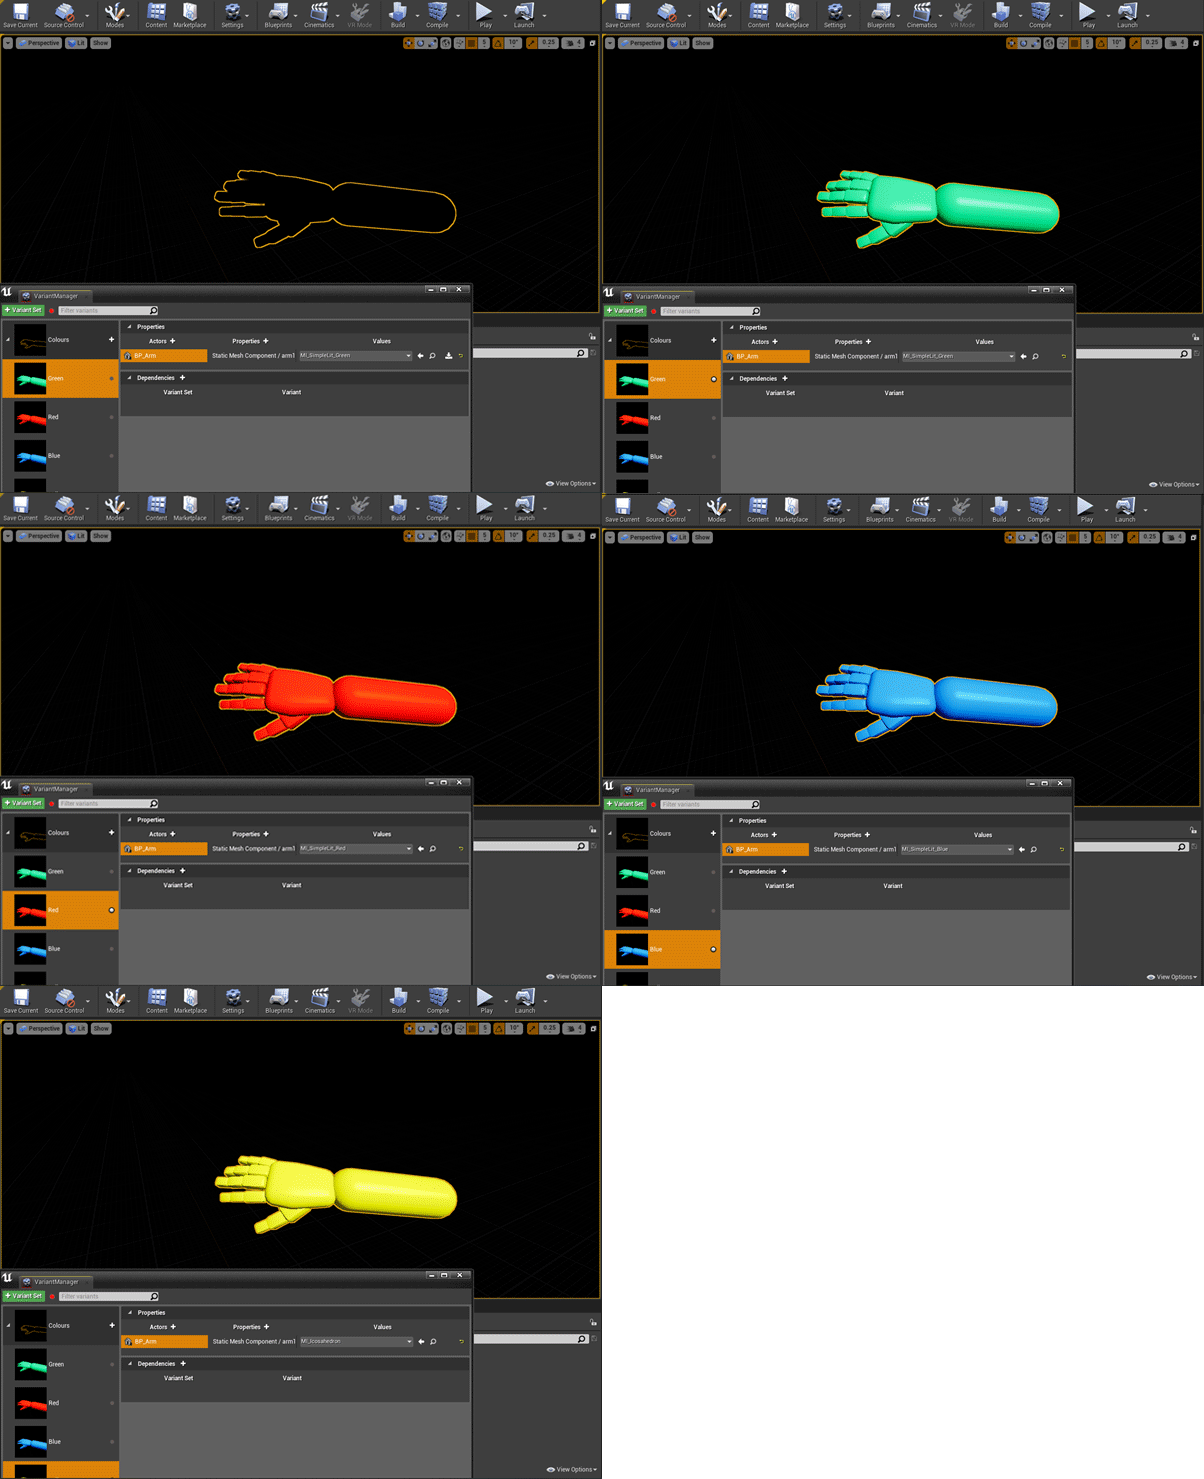
This provides many benefits. The Variant Manager’s interface is user friendly, so other developers can instantly understand the structure of the variants, and can easily edit or switch between them. This reduces the amount of programming required to achieve the same result.
Another benefit is that it’s scalable. Each variant can have other actors included with their various properties set. Additional variant sets can be added and activated independently of each other. This will be useful when tooltips or other actors need to be added to each arm’s ‘layer’ in the project.
The Variant Manager also comes with several blueprint controls that can be activated during run-time of the project. These include switching variants by either name or index.
Using the Menu to control the Variant Manager
Once the UI menu was created, the logic needed to be added to each button. The first step was to print a string for each menu option to the console, so it was clear what button was being activated.
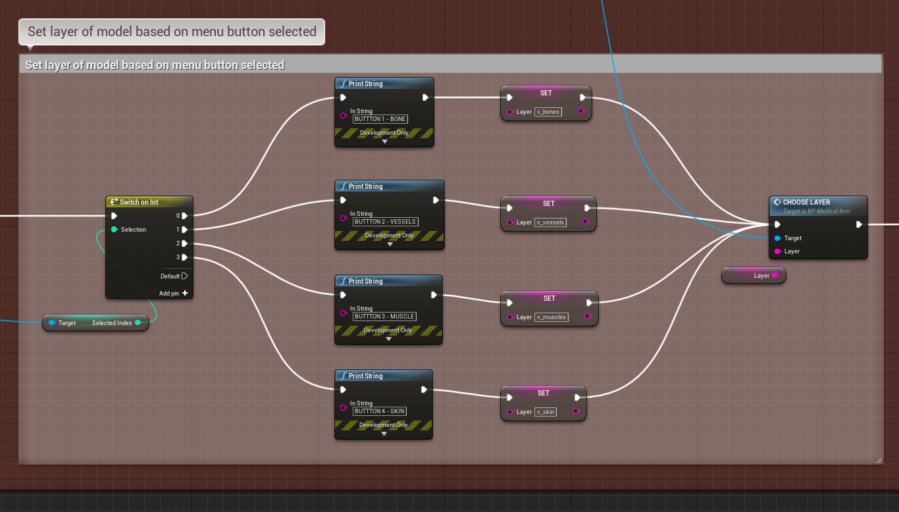
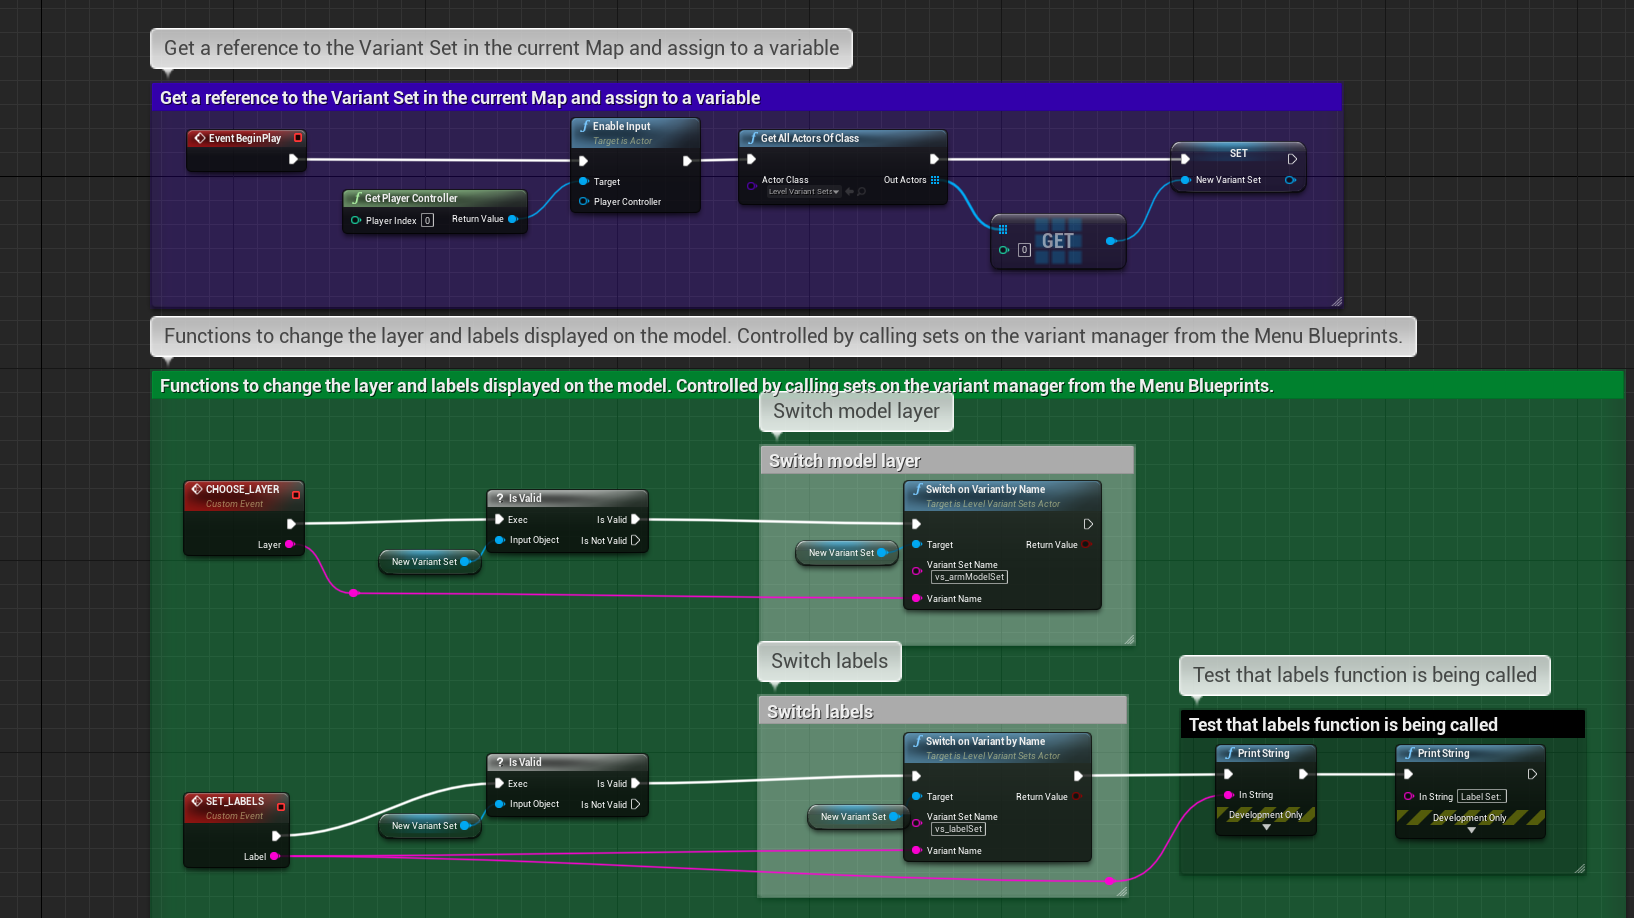
Each button set an appropriate value to the variable called ‘Layer’, which was then fed into a custom event called ‘CHOOSE LAYER’. The ‘CHOOSE LAYER’ event is on the model’s blueprint, accesses the Variant Manager, and sets the required layer as active.
Video clip
The video below shows a short clip of how the menu is operated and switches between the four specific variants of the Variant Manager. The menu has been edited into a toggle menu so only one option can be selected at a time, and the menu is driven by the light-blue simulated hand controls from the UX Tools plugin to demonstrate how the user would interact within the HoloLens 2.
Optimisation and refactoring

In refactoring the blueprint, improvements were made by taking the ‘Get Actor of Class’ call out from each menu button call and only calling it once on ‘Event Begin Play’. The referenced model was then added to a variable in memory, and this was then accessed each time the menu button was pressed rather than continually calling the ‘Get Actor of Class’ command. This optimised performance of the blueprint and simplified the layout making it easier to read.
Next steps
- AnatoMe development
- Building a UI for a HoloLens 2 app
- Using the Variant Manager to control an AR scene (you are here!)
- Adding tooltips in Augmented Reality
